
How to Create a Buyer Application
How to Create a Buyer Application
In this article, you'll learn how to screen potential buyers by requiring approval for anyone interested in purchasing your animal.
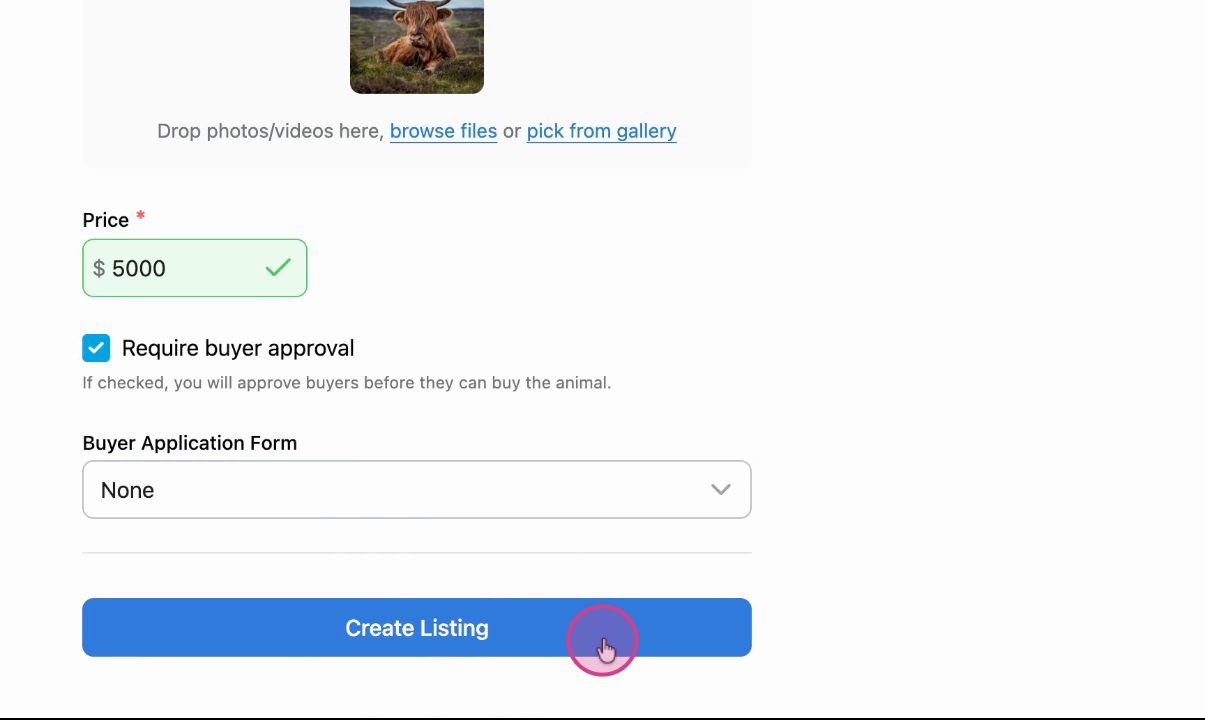
Step 1: When you are listing an animal for sale, checking the box labeled require buyer approval. This allows you to screen potential buyers before they can purchase your animal.
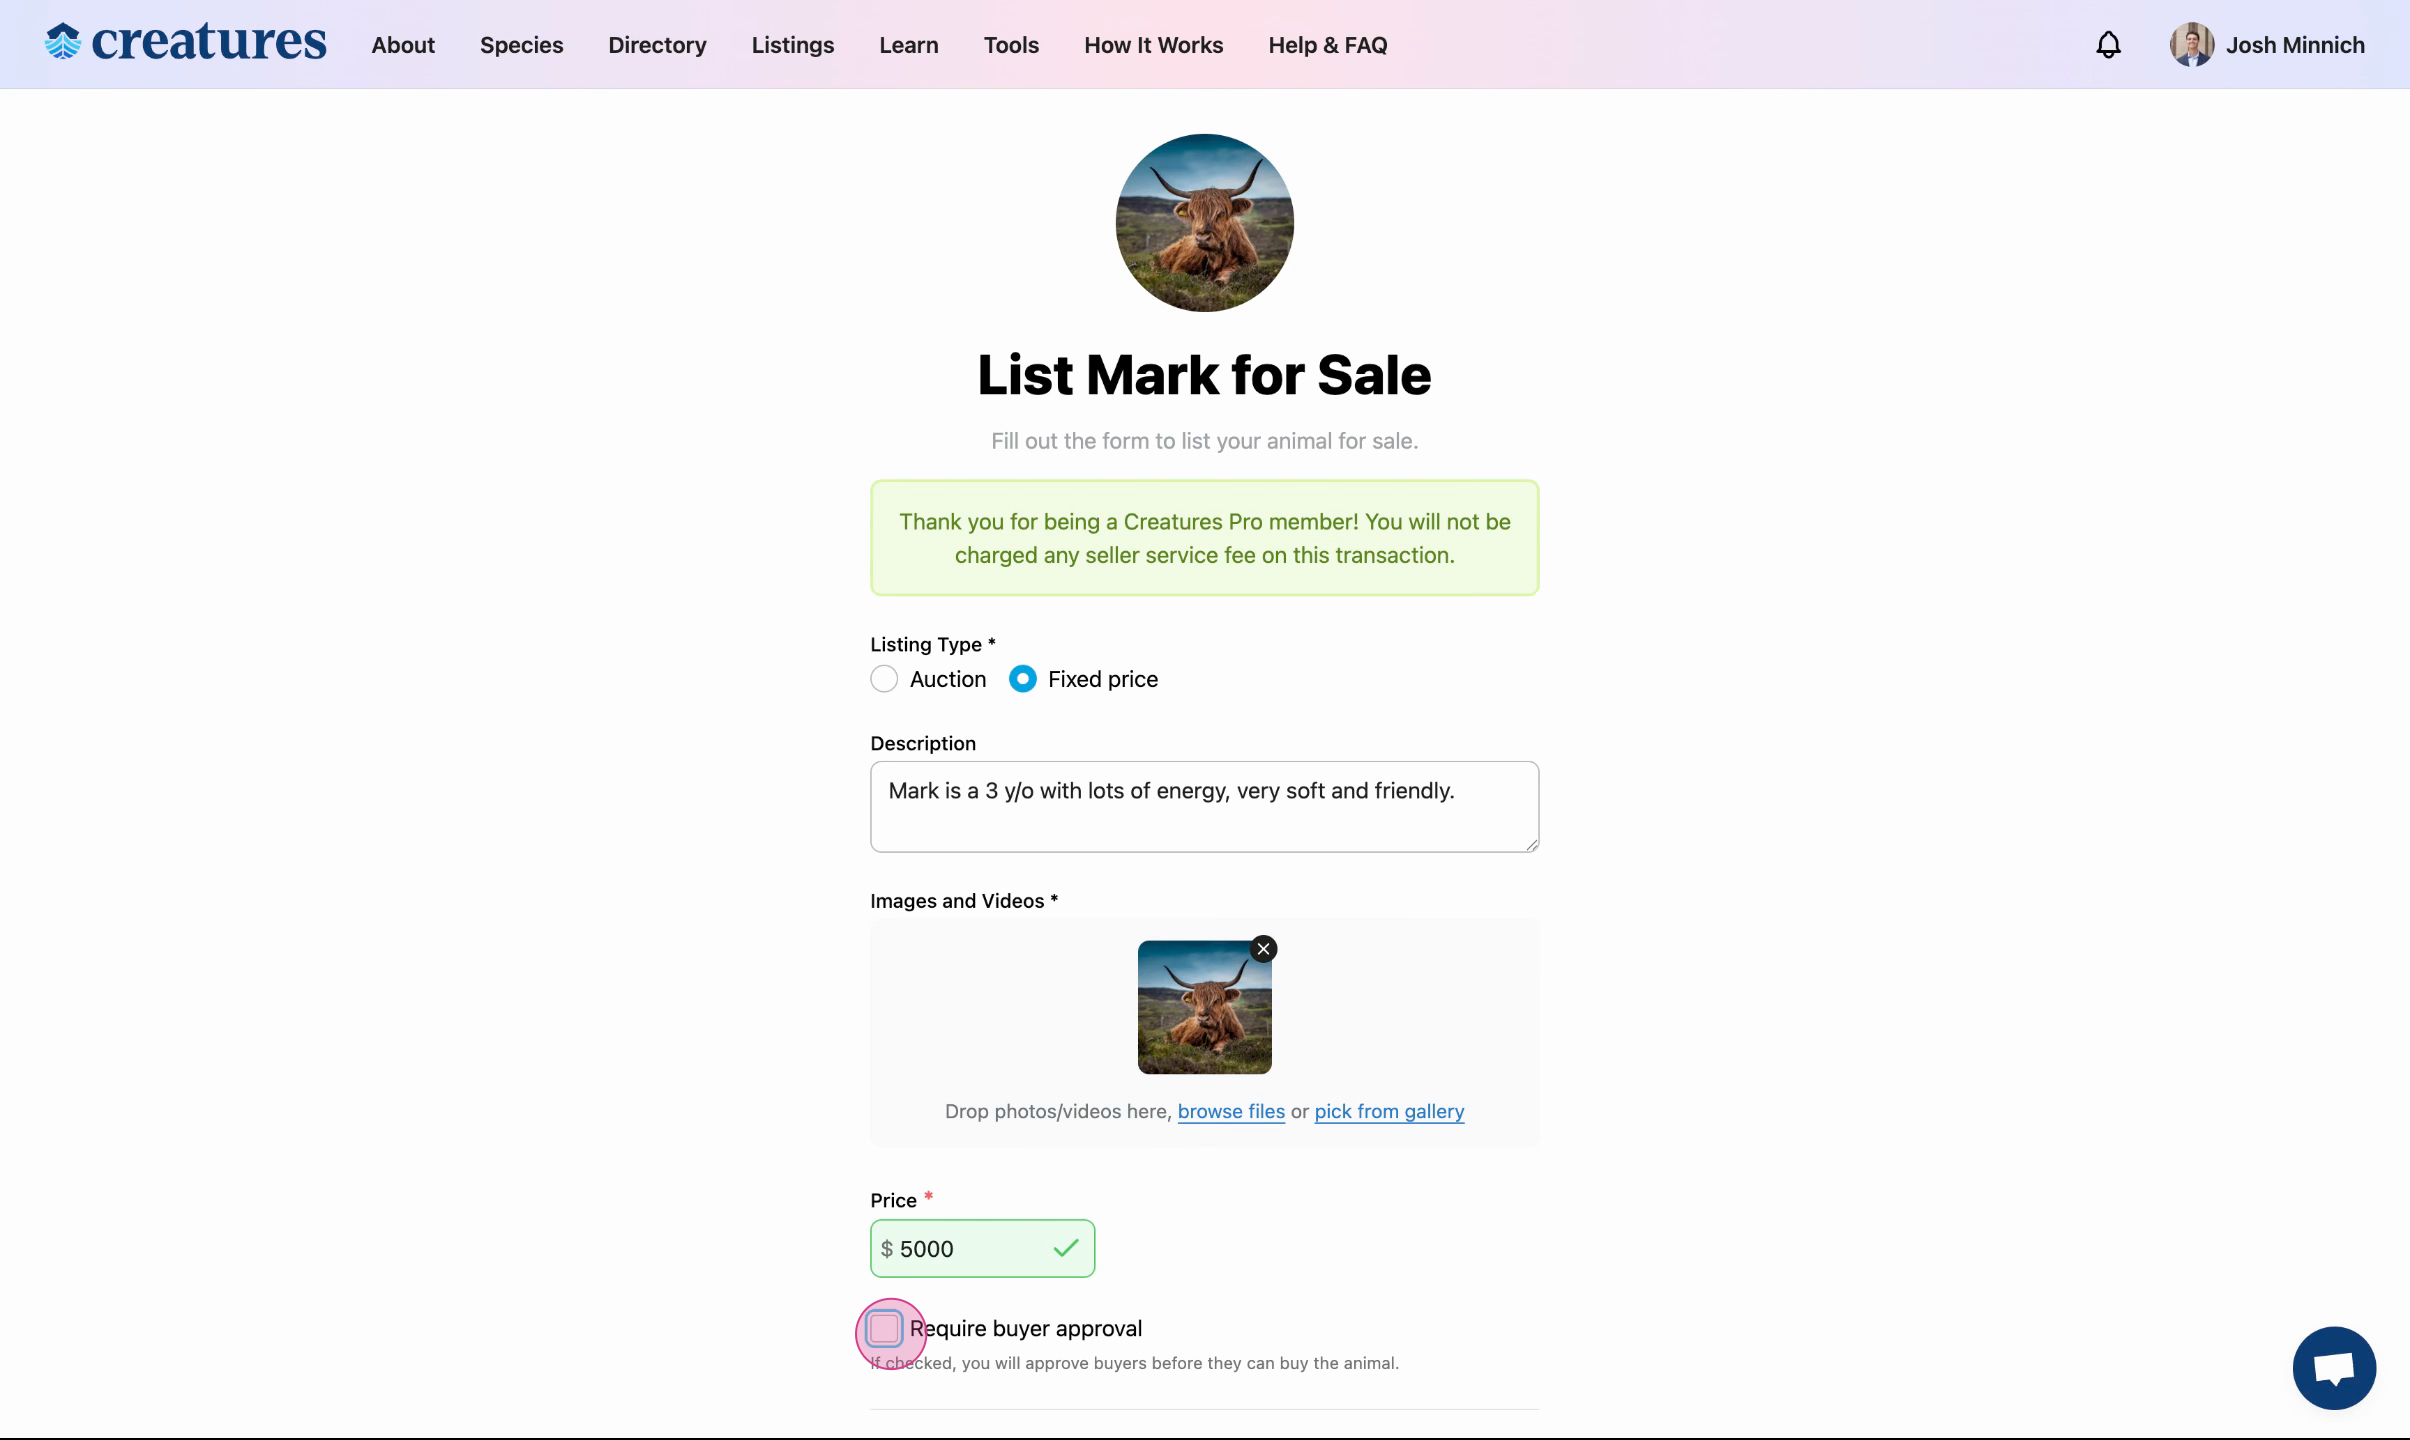
Step 2: After checking the box, you'll have the option to add a buyer application form. For now, leave this box checked to scan buyers' profiles before allowing them to purchase.
Watch this tutorial for a walkthrough for how to create a buyer application form: How to Create a Buyer Application with Forms
For now, let us assume we just want to screen the buyer profiles without creating a form.
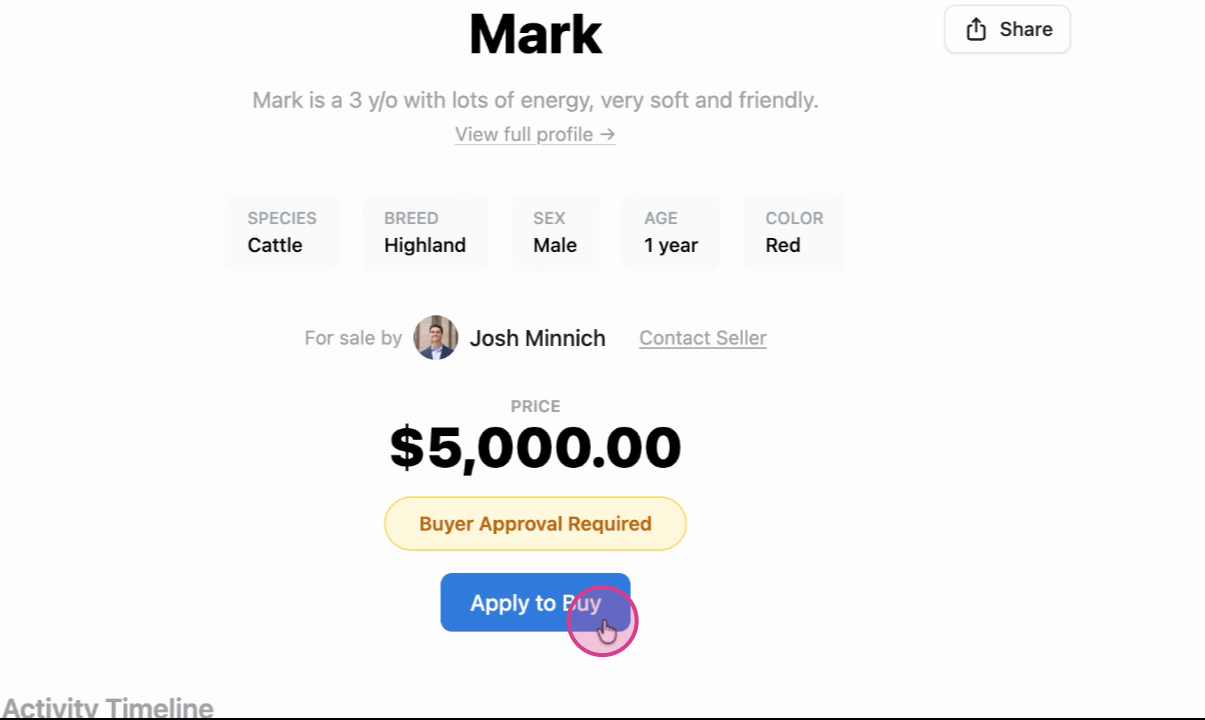
Now, when buyers see your animal listed, they must apply to buy, as shown in the following screenshot from the buyers perspective.
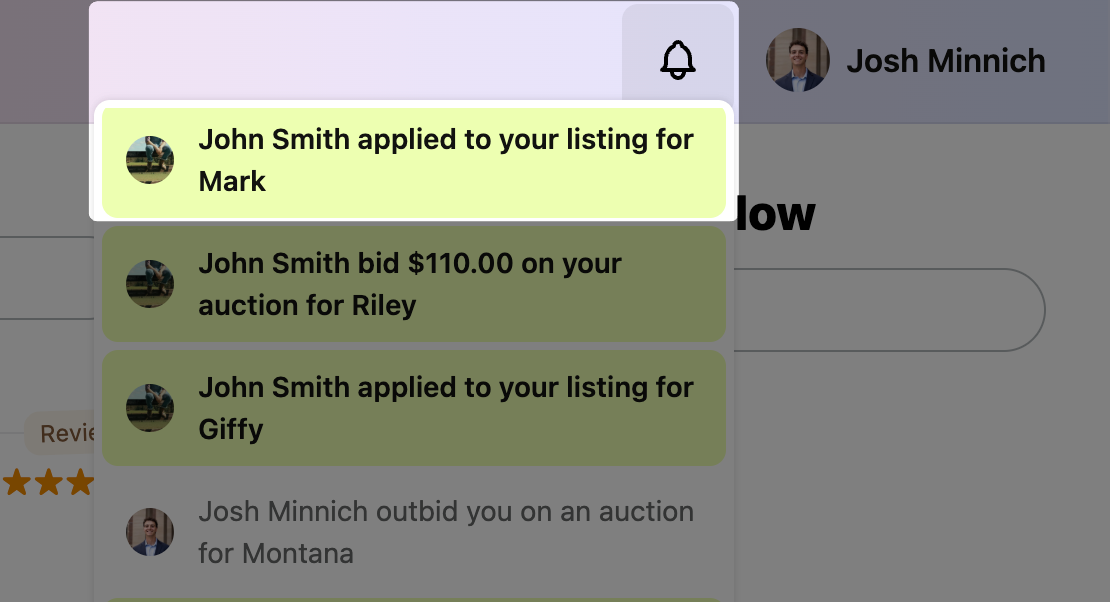
As a seller, you will receive a notification when buyers apply to buy an animal of yours.
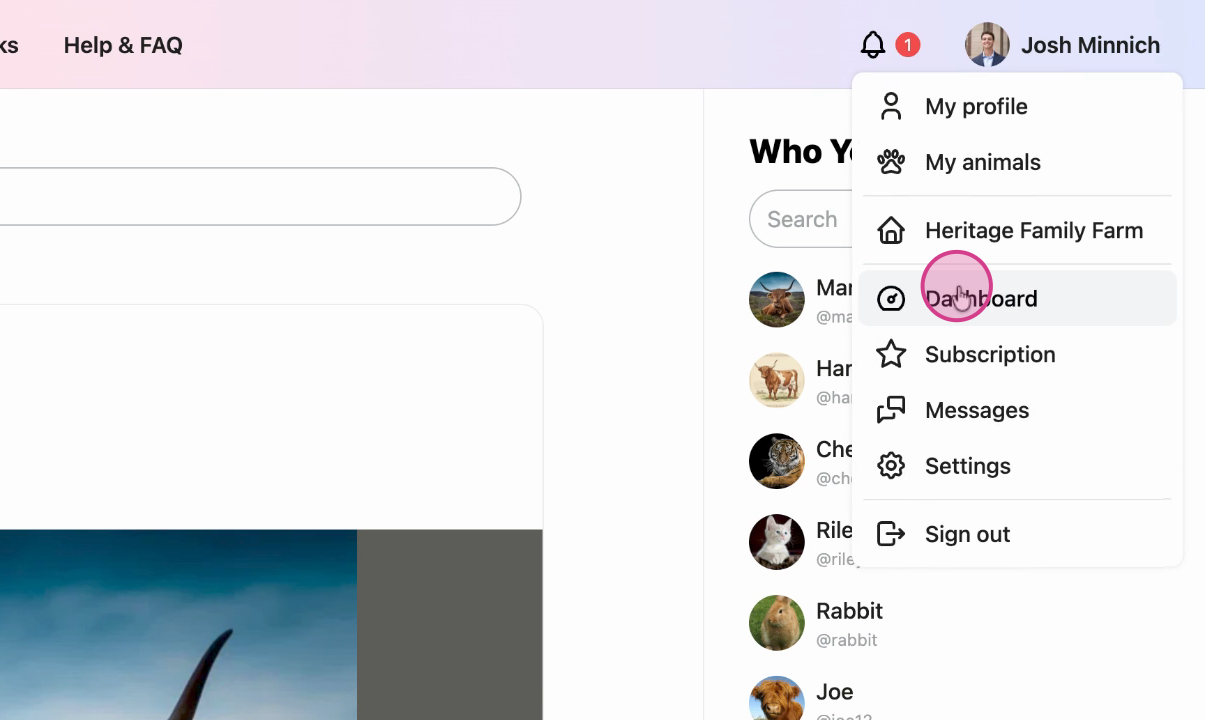
To begin the approval process, first navigate to your dashboard.
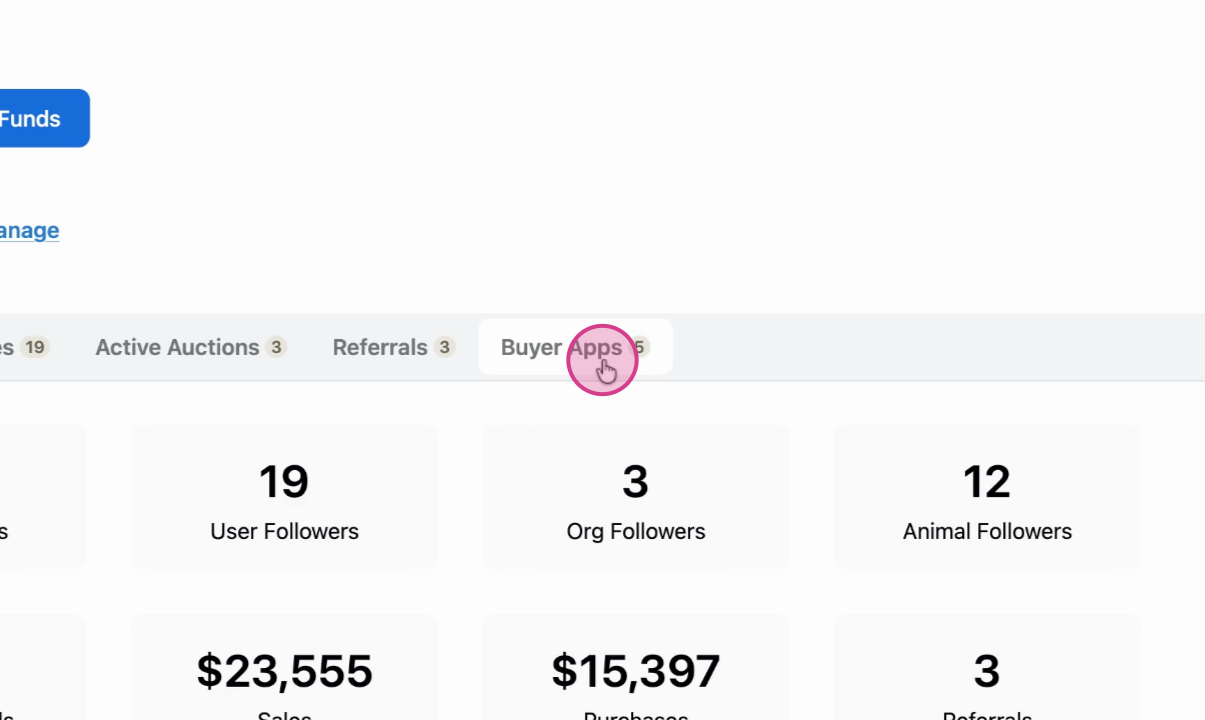
Click on the buyer apps tab within the dashboard.
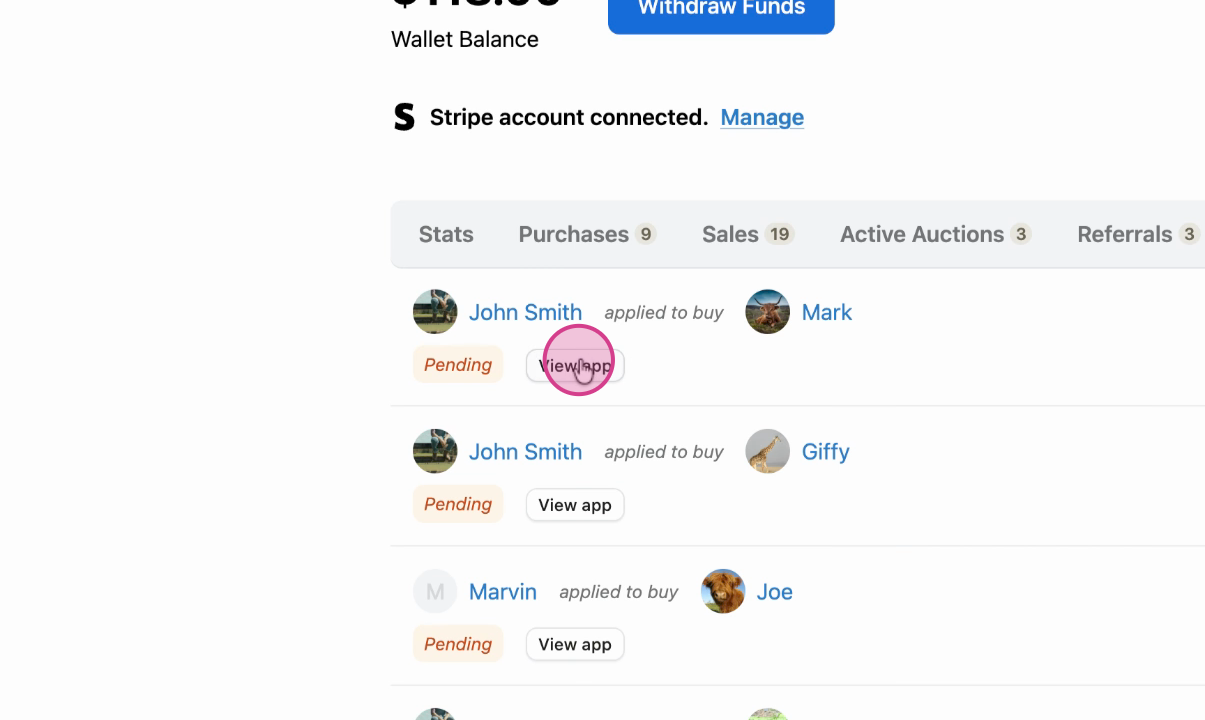
Here, you'll see that John Smith has applied to buy your animal. Click View app.
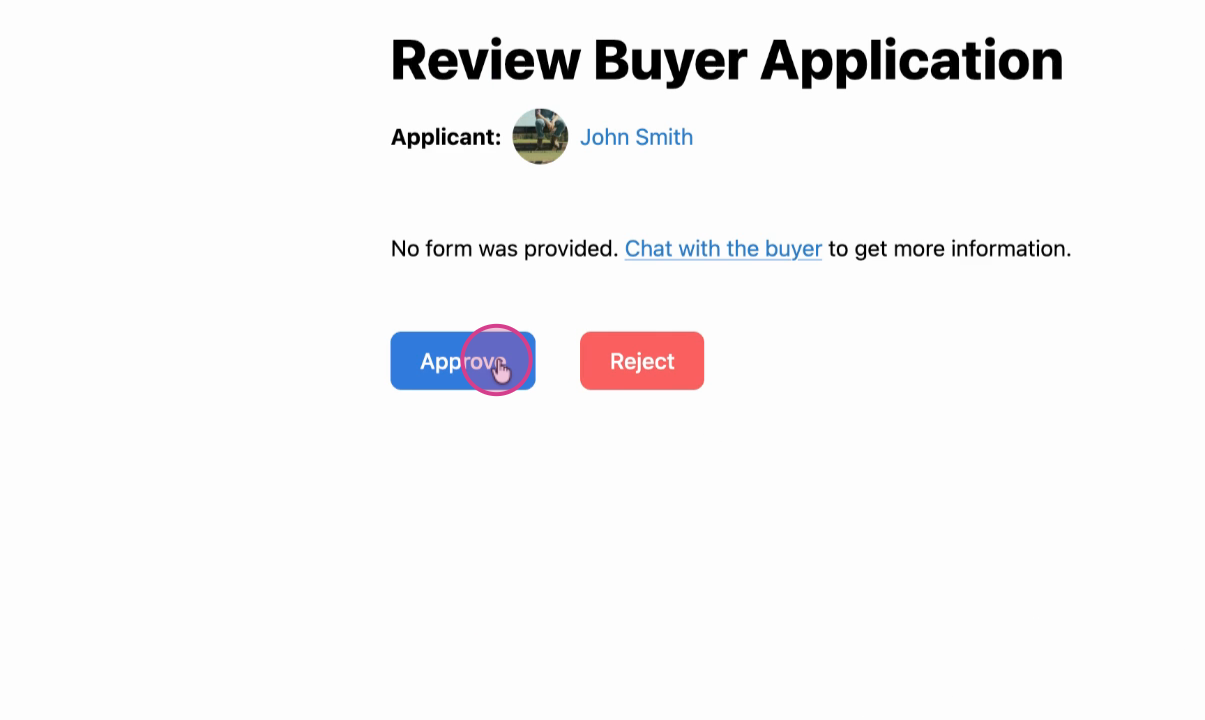
Evaluate the buyer.
Feel free to contact the buyer or view their profile.
Approve or reject the application as you see fit.
Buyers will receive a notification that they are now able to purchase the animal.
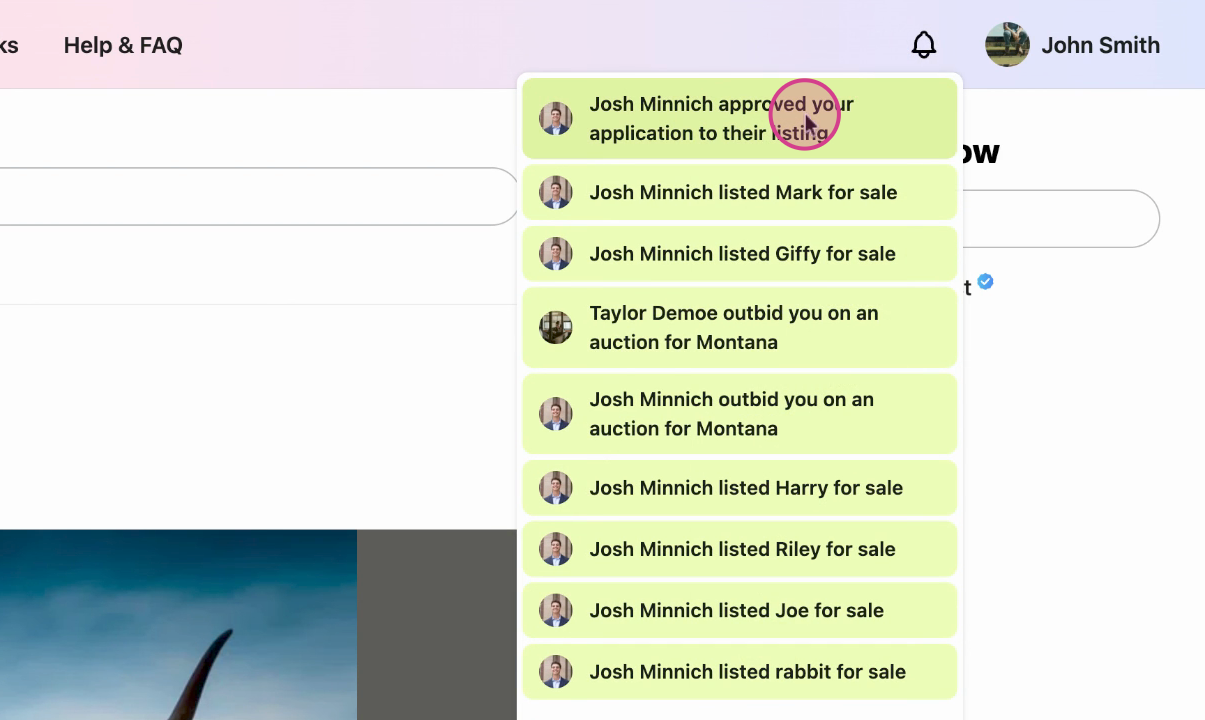
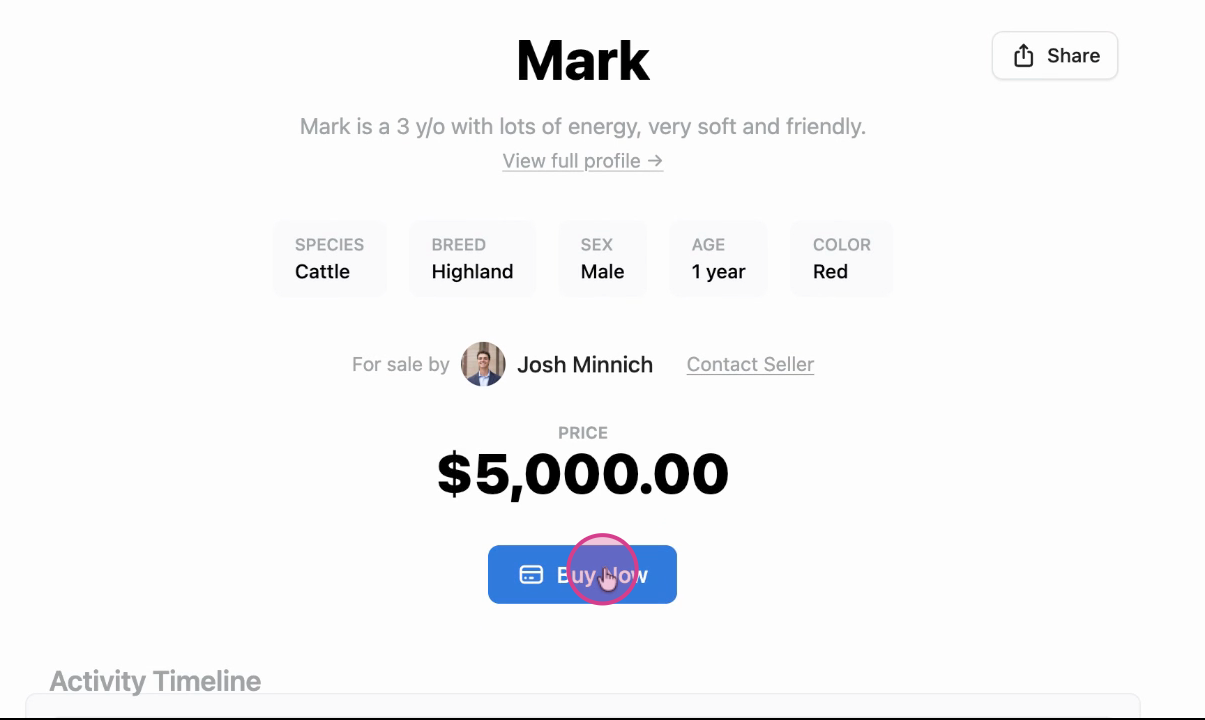
Clicking the notification brings us back to the listing where the buyer is able to complete the purchase by selecting Buy Now.
By following these steps, you can effectively screen potential buyers and ensure that your animal goes to a suitable home.
Related articles:
- What are Buyer Applications?
- How to Create a Buyer Application with Forms
- How to Fill Out a Buyer Application
- How to Approve or Deny a Buyer Application
Updated on: 02/02/2026
Thank you!