
Adding photos, then publishing and updating your site
Adding photos, then publishing and updating your site
This is the article for putting photos on your site and then taking it live, plus the loop you use to update it afterward. The headline facts: publishing is free and needs only a handle, and after you are live, every edit stages as a draft until you choose to publish it.
Photos and media
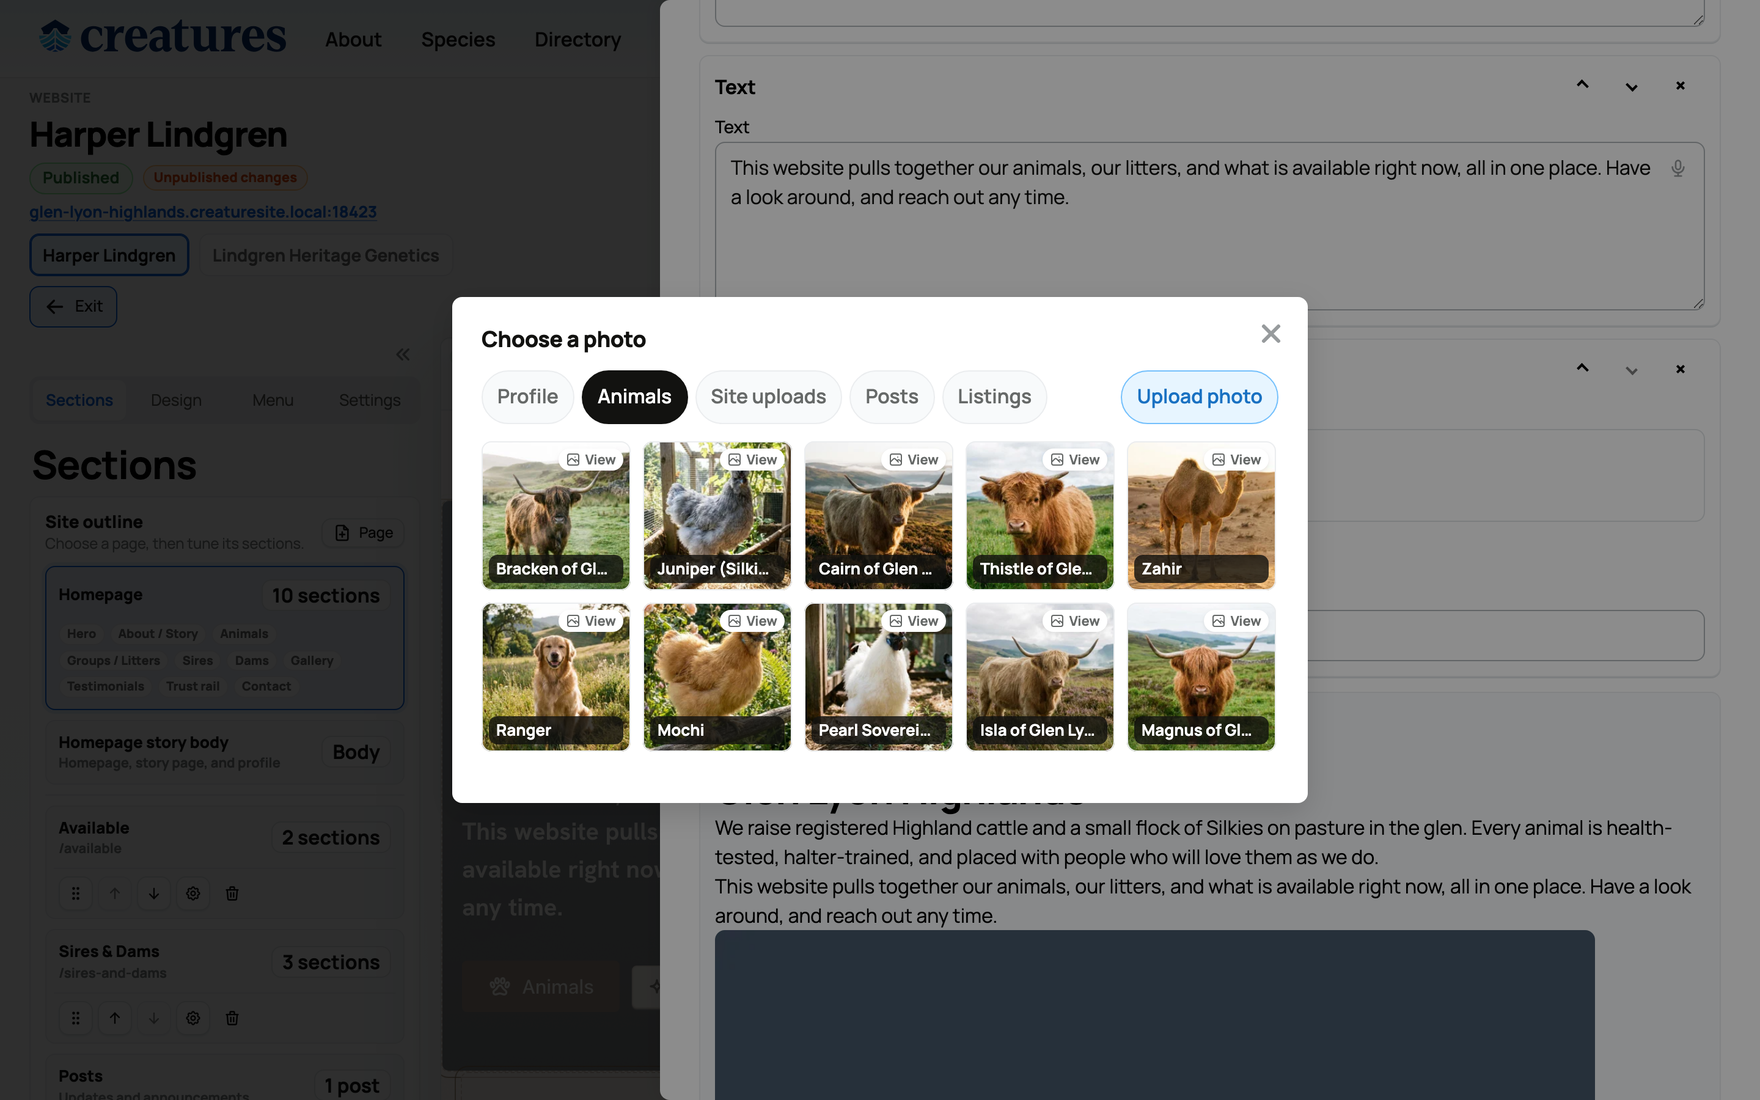
Site images come from a shared photo picker that you reach from any image control in the builder:
- Upload site images: add new photos for the site.
- Reuse what you already have: the same picker can pull from your profile photos and from any animal's gallery, so you do not have to re-upload pictures you have already added to Creatures. It also surfaces site uploads, post images, and listing images you own.
- Only your own images: you can place an image on the site only if it is one you uploaded for the site or picked from your own galleries. The builder checks ownership, so you cannot accidentally use someone else's photo.
This is the same reuse-first idea as the rest of the builder: your existing photos are available to the website without duplicating them.
Publishing the first time
To take your site live:
- Set your handle in Settings. The handle is your web address: it must start with a letter, be 4 to 32 characters, use only lowercase letters, numbers, and hyphens, be unique, and not be a reserved word. A starter handle is suggested, and you can change it before you publish.
- Publish. Your site goes live at
https://{your-handle}.{theCreatures sites domain}/.
Publishing is free and requires only a valid, non-reserved handle. There is no identity check, no phone verification, no payout account, and no payment needed to publish a website. (That is different from selling, which does require verification.) The one thing that can block publishing is the handle: if it is empty or set to a reserved word, publishing stops with a clear "choose a site handle first" style message until you set a valid one.
The draft-and-publish loop for updates
After you are live, you do not edit the public site directly. Every change stages into a draft first:
- While you edit design, pages, sections, blocks, posts, or visibility, your changes accumulate in the draft, and the builder shows the "Unpublished changes" pill. Visitors keep seeing the current live site the whole time.
- Publish changes pushes your whole draft live at once, in one step, and clears the draft. There is no partial publish; what you have staged goes out together.
- Discard changes throws the draft away and reverts everything to the current live version, which is your undo if you do not like where an edit session went.
The takeaway: experiment as much as you like, because nothing reaches visitors until you publish, and you can always discard back to live.
Unpublishing (going back offline)
If you need to take the site down, Unpublish sets it back to a draft state. Your subdomain then returns "not found" to visitors until you publish again. Your content and design are kept; unpublishing just takes the public site offline. Publish again whenever you are ready to be visible.
Preview and View live site
- Preview lets you see your site privately, including staged draft changes, before you publish. Use it to check how an edit looks without exposing it.
- View live site opens your actual published site at its subdomain once it is live, so you can see exactly what visitors see.
What a visitor sees on the live site
When your site is published, a visitor on your subdomain can reach:
- the home page (
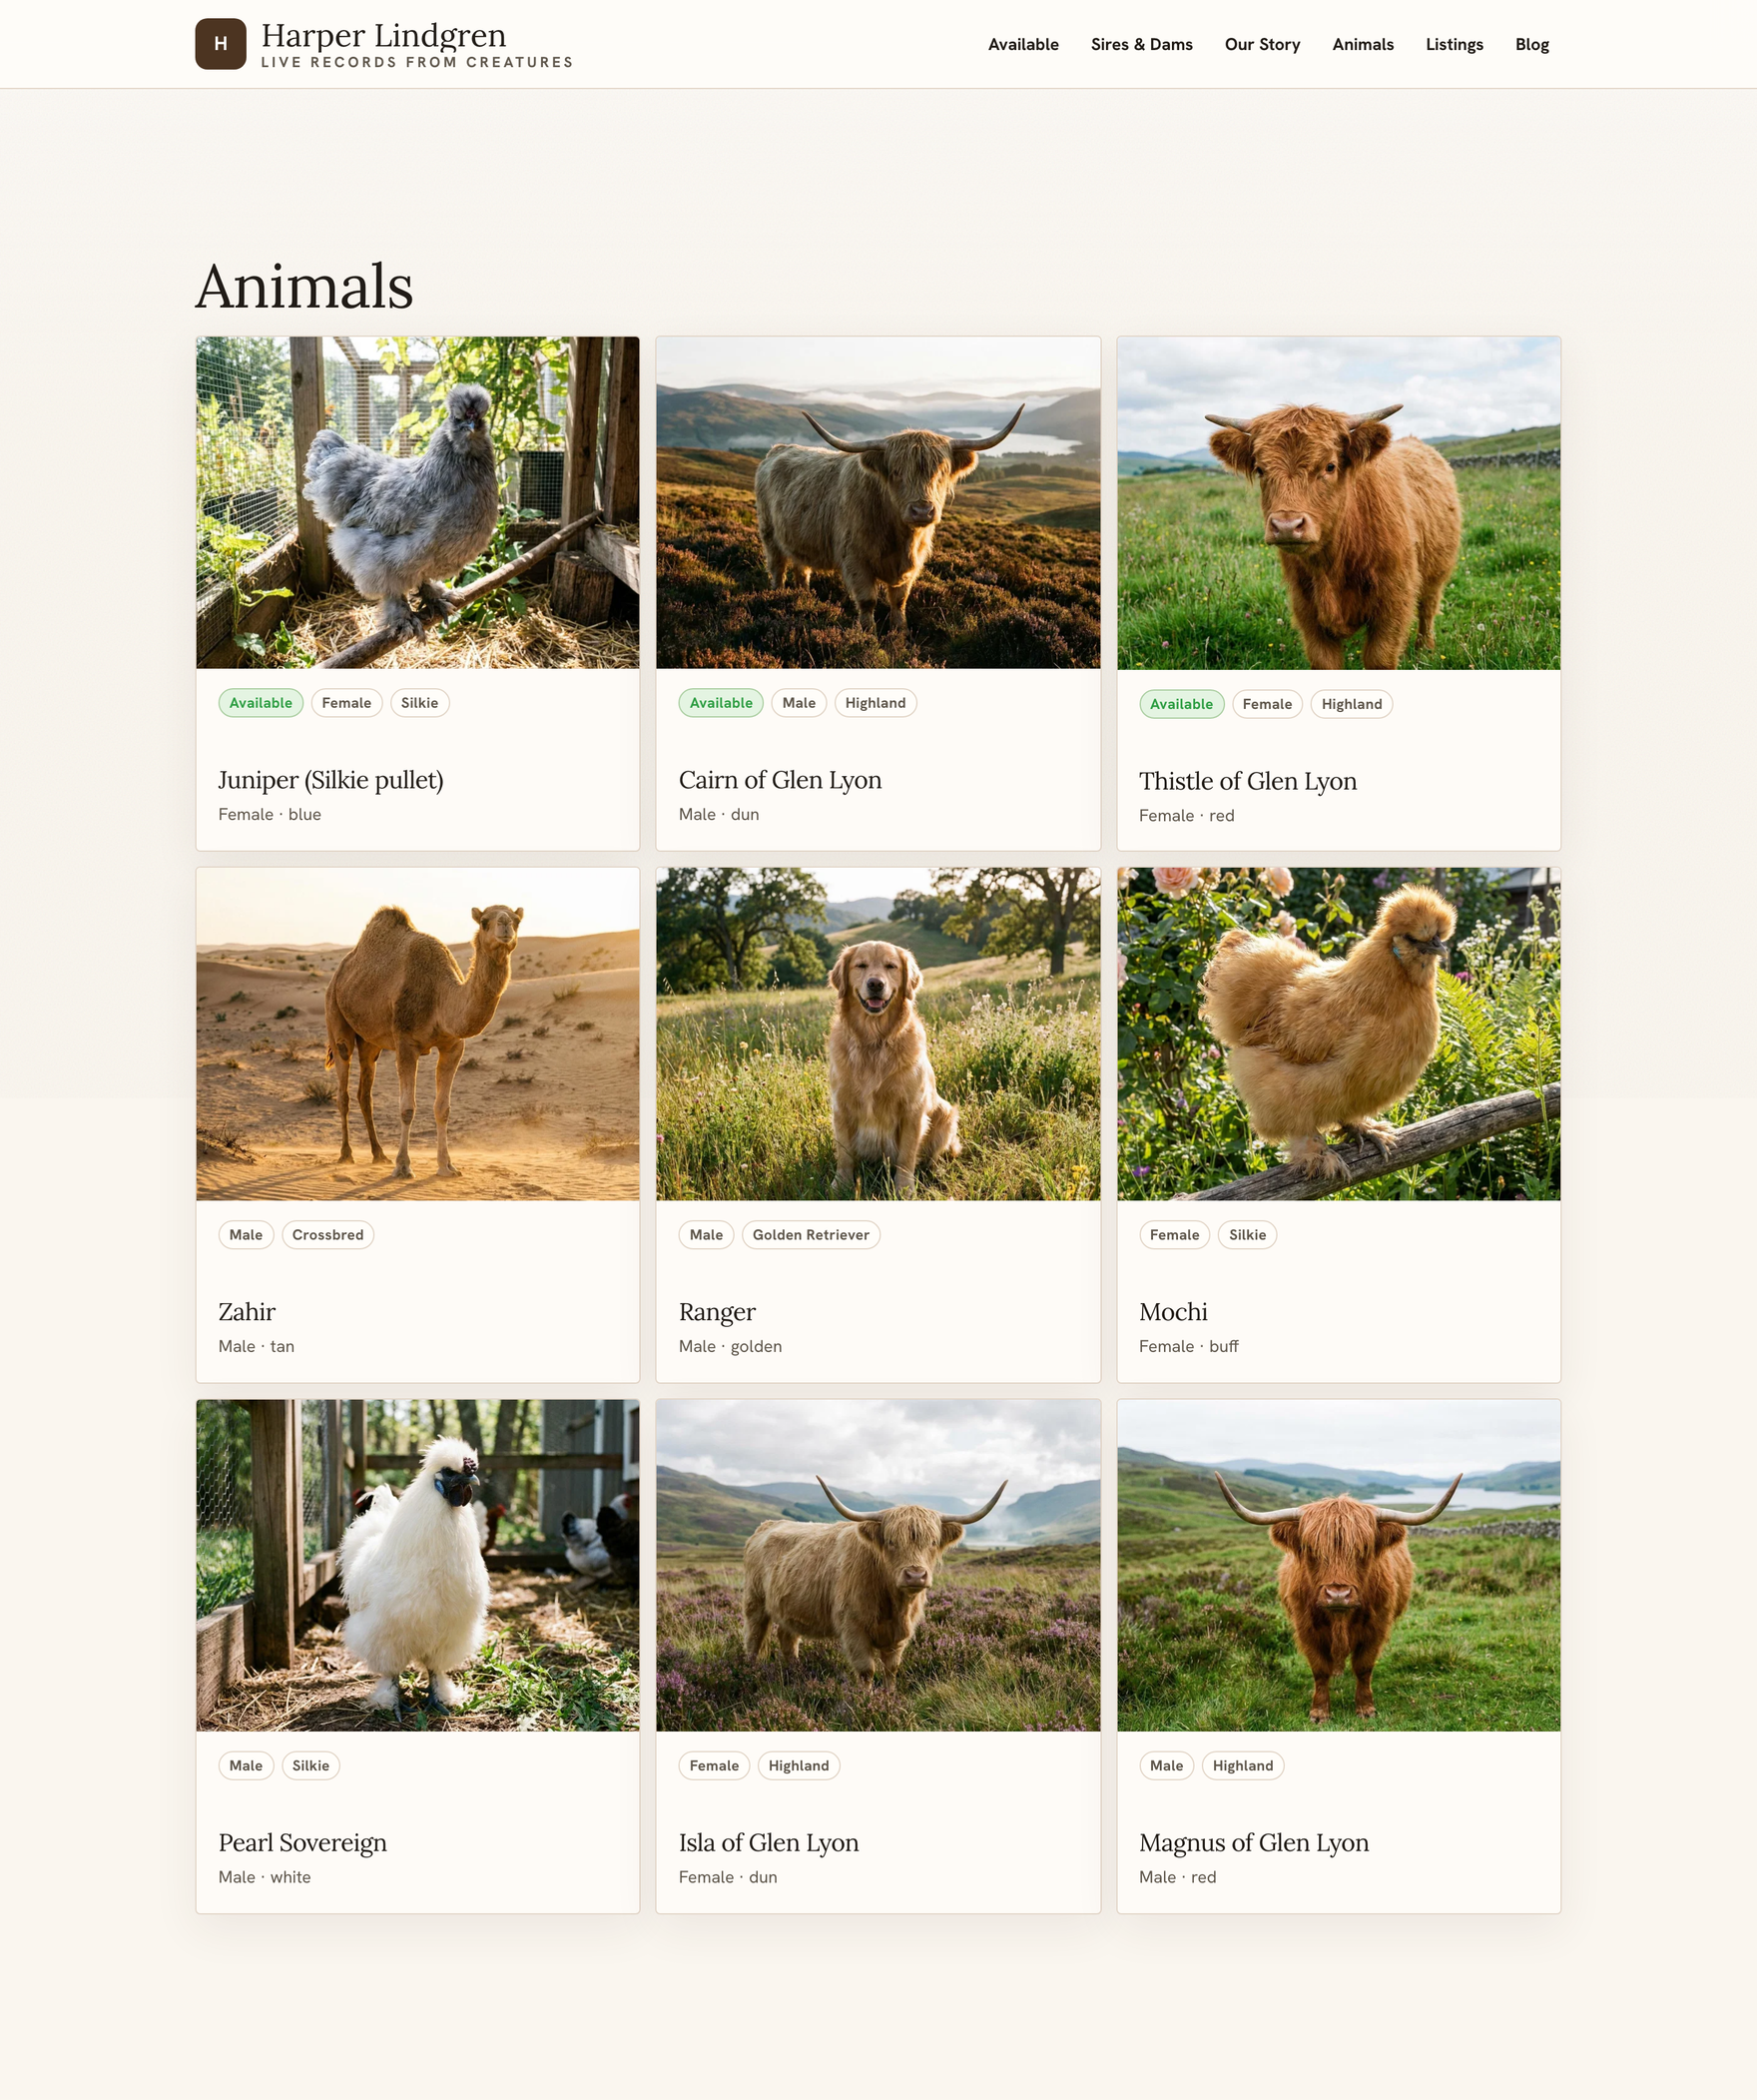
/), - your animals page (
/animals) and listings page (/listings), - your blog (
/blog, and each post at/blog/{slug}), - your custom pages (
/p/{slug}) and group pages (/groups/{id}), - and a /sitemap.xml, which helps search engines find and index your pages.

Only published pages and posts, and only public items, appear here; anything set to draft, archived, creatures_only, or private stays off the public site as described in Choosing what the public sees.
Your published site is its own public address, separate from how buyers find you inside Creatures. To also be discoverable in Creatures' own breeder search, see Getting listed in the breeder directory.
For the model behind all of this (one site per account, the subdomain, the draft and live versions), see Your Creatures website: what it is and how to open the builder. For what you are publishing, see Designing your website, Building pages, sections, and posts, and Choosing what the public sees.
Related information
- Your Creatures website: what it is and how to open the builder
- Designing your website: layouts, colors, and the AI restyle
- Building pages, sections, and posts
- Choosing what the public sees: animals, listings, the menu, and visibility
Updated on: 23/06/2026
Thank you!