
Creating a show
Creating a show
To create a show, go to Dashboard > Events > Shows and select New show. This article walks every field on the form, top to bottom (for how a show works from start to finish, see Running shows on Creatures). Nothing here publishes the show: when you save, it lands as a draft on the manage page, where you add classes and publish when you are ready.
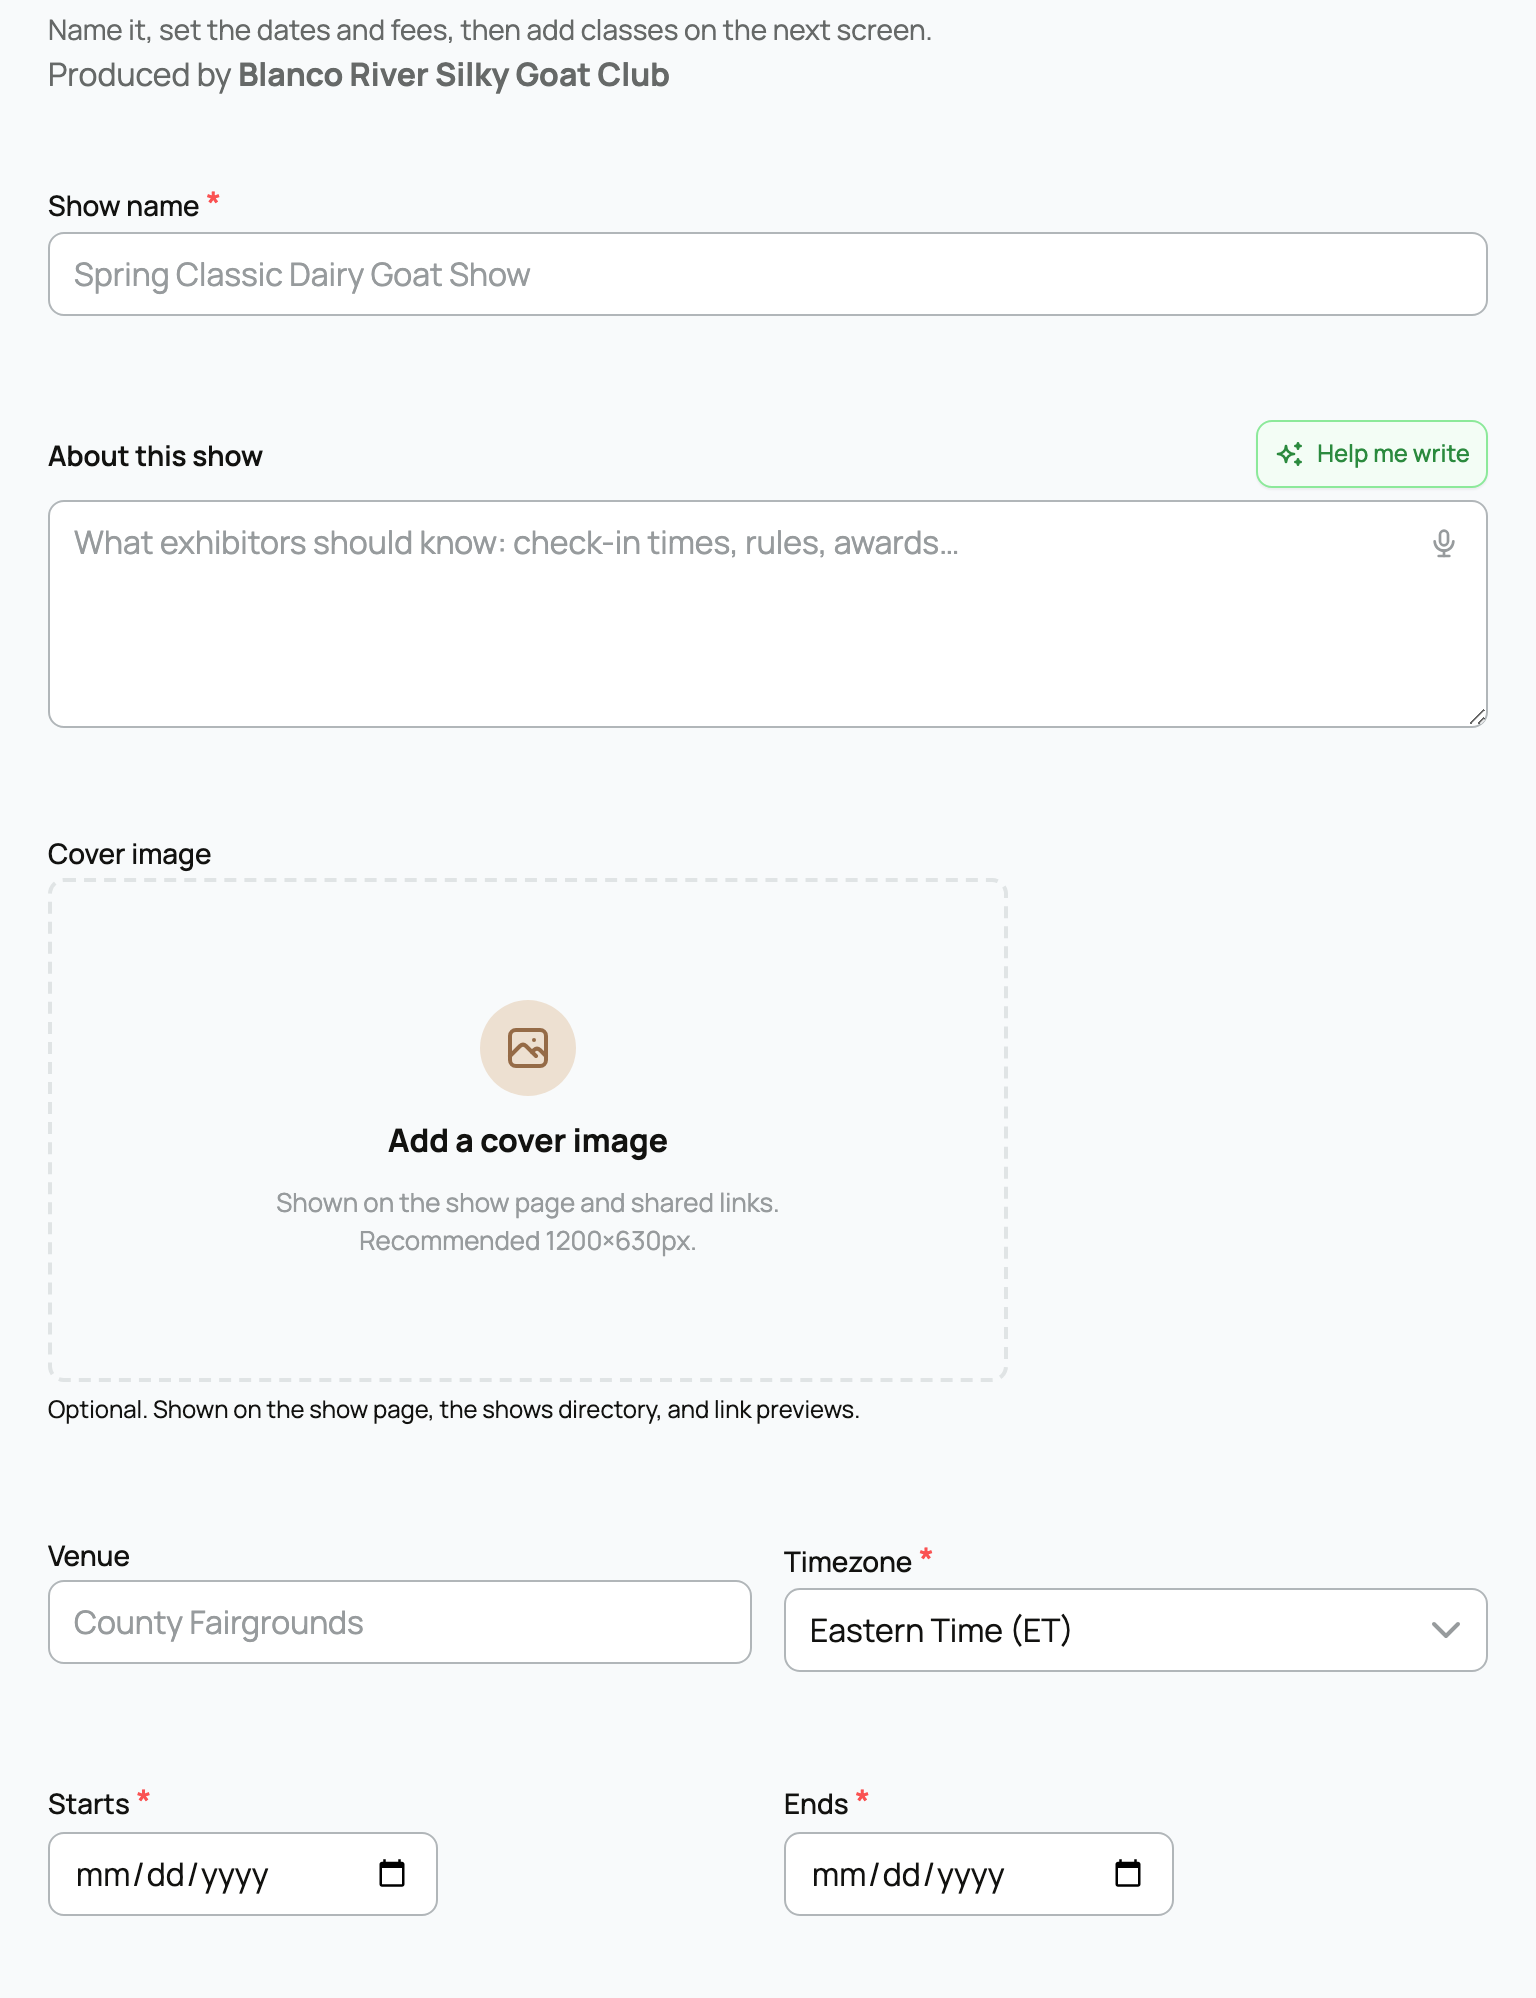
The details exhibitors see
- Producing organization. The org that runs the show. If you own or co-own more than one organization, you pick which one here; if you have just one, the form shows "Produced by" that org. This matters because entry fees pay out to this organization's wallet, and its Owners and Co-Owners are who can manage the show.
- Show name. Required, up to 120 characters. This is the title on the show page and in the directory.
- About this show. A description of what exhibitors should know: check-in times, rules, awards, and so on. There is an AI assist button that drafts or polishes this for you. Optional, but a clear description helps exhibitors decide to enter.
- Cover image. An optional banner shown on the show page, in the directory, and on shared links. Recommended size is 1200 by 630 pixels. You can add it now or later from the edit form.
- Venue. The facility name (for example "County Fairgrounds"), up to 120 characters. Optional.
- Timezone. Required. Pick the show's local timezone (US zones are listed first, then all zones). Every date and time you enter is interpreted in this timezone, so exhibitors see the right local times.
- Starts and Ends. Both required dates. A show cannot end before it starts.
- Entries open and Entries close. Optional date-and-time fields. "Entries open" is shown to exhibitors on the show page. "Entries close" is the point new entries stop, and Creatures reminds exhibitors with unfinished entries before it. Leave them blank to keep entries open while the show is published.
- Species. An optional multi-select. Pick the species this show is for, or leave it empty for an all-species show. When a show is a single species, the exhibitor's animal picker is automatically narrowed to that species.
Entry fees
This section sets what exhibitors pay and how the service fee works. The section intro says it plainly: what exhibitors pay per class, plus a small processing and service fee added to their cart at checkout, and your org keeps the full entry fee.
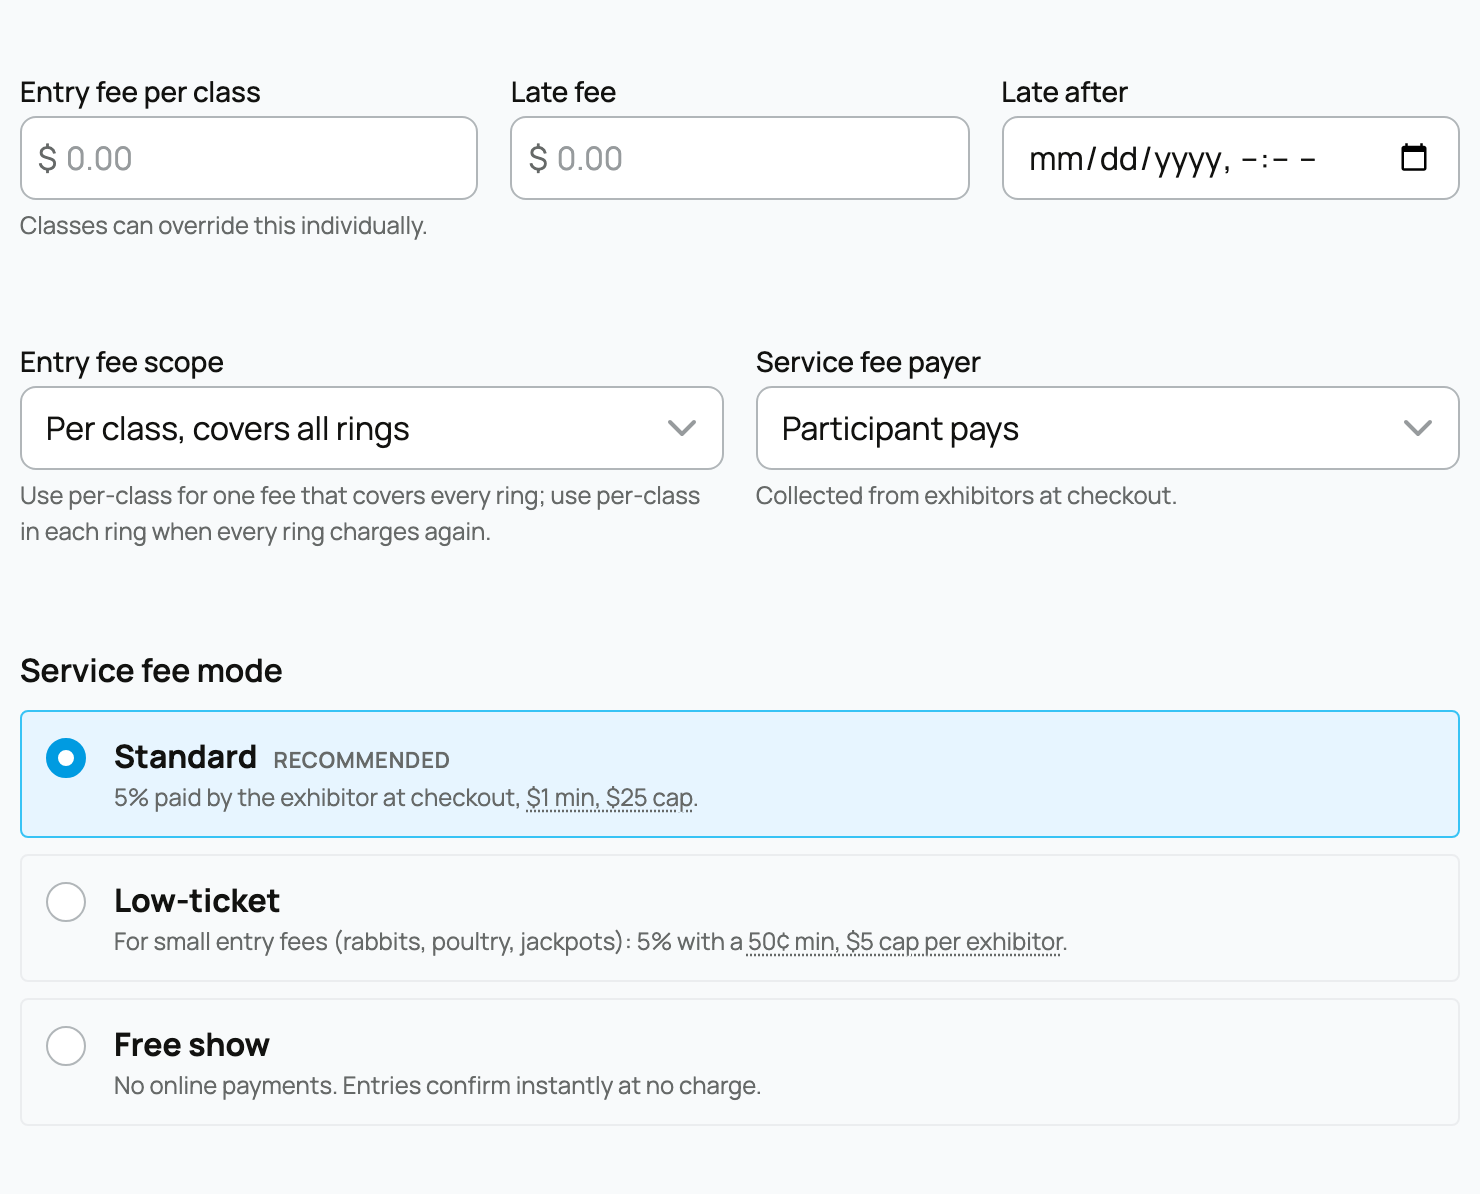
- Entry fee per class. The default dollar amount an exhibitor pays to enter one class. Individual classes can override this (see Classes and rings).
- Late fee and Late after. An optional surcharge and the date and time it starts applying. The show page displays it to exhibitors as "plus (amount) after (time)."
- Entry fee scope. How the per-class fee adds up across your rings. This is the setting exhibitors feel most, so here is each option with a worked example (using a $10 fee, one animal entered in 2 classes, at a show with 2 rings):
- Per class, covers all rings. One class fee per class, no matter how many rings. Example: 2 classes at $10 is $20.
- Per class in each ring. The class fee applies again in every ring. Example: 2 classes across 2 rings at $10 is $40 (each class is charged once per ring).
- Flat fee per ring. A single ring fee per animal, summing your rings' fees, charged once for that animal no matter how many classes it enters. Example: 2 rings at $10 is $20 for that animal.
- Flat event fee. One flat fee per animal for the whole event, whatever it enters. Example: $10 for that animal, once.
- Package. One package price per animal for the whole event (a price you set, or the default fee), charged once per animal. Example: $10 for that animal, once.
- Service fee payer. Who pays the processing and service fee. Today the only option is Participant pays: it is collected from exhibitors at checkout, and your org is never charged it.
- Service fee mode. How that exhibitor-paid fee is calculated. The rate is normally 5% (Creatures can arrange a different rate for specific partners). Pick the mode that fits your entry prices:
- Standard (recommended). The normal 5% paid by the exhibitor at checkout, with a $1 minimum per cart and a $25 cap on class entries. (Add-ons like stalls stay at the rate with no cap.) Best for typical entry fees.
- Low-ticket. For small entry fees (rabbits, poultry, jackpots): the normal 5% with a $0.50 minimum per cart, and no exhibitor ever pays more than $5 in fees across the whole show, no matter how many times they enter. Best when classes are only a few dollars each.
- Free. Creatures adds no service fee at all on top of your entry fees. This setting is about the service fee, not your prices: if you also set your class fees to $0, entries confirm instantly with no payment step; if you charge entry fees, exhibitors still pay those (with nothing added). Best for a club show where Creatures should not add any cost.
Sanctioning (optional)
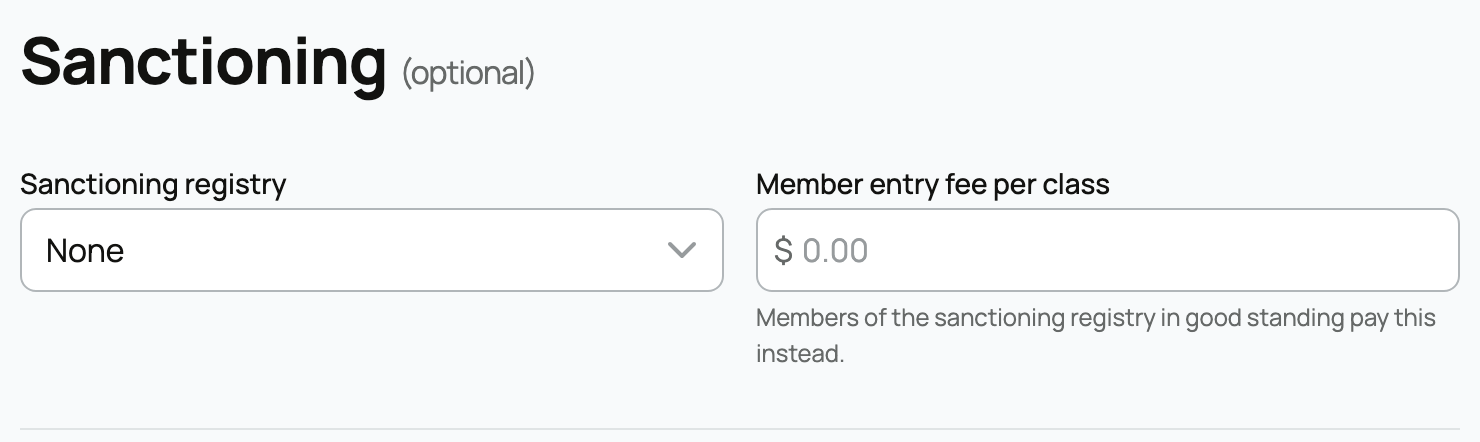
If your show is sanctioned by a registry or association, you can say so here. This is a self-declared badge, not an approval or partnership process: you pick the registry, and the show page shows "Sanctioned by" that registry. There is no verification step, and no one has to approve it.
- Sanctioning registry. Pick a registry, or leave it as "None." Choosing one shows the sanctioning badge on the public show page.
- Member entry fee per class. An optional discounted per-class fee for members of that sanctioning registry who are in good standing. When set, members pay this instead of the standard entry fee. It only applies when you have chosen a sanctioning registry.
For what an activated registry or association can do on Creatures, see Registries and associations on Creatures. "Members in good standing" is defined by the registry's own imported roster; see Importing and managing your membership roster.
Saving your show
Select Create show and your show is saved as a draft and opens on the manage page. Nobody can see it yet. Your next step is to build the class list and (if you want more than one ring) set up rings: see Classes and rings. When the class list is ready, you publish the show from the manage page.
If you already have a premium list document, you do not have to type all of this: see Importing your premium list with AI.
Related information
Updated on: 17/07/2026
Thank you!